|
tips on
photographing Your own art |
|
my
digital jury image services |
|
|
|
Using Black and White to Correct Color
by Larry Berman and Chris Maher |
|

|
| I make it a habit to attend Photoshop
workshops and seminars whenever possible to learn new real world tips and
techniques. I came across the Digital Calibration Target at an Ed Pierce
seminar where he was teaching how to use it to match the brides skin tone
under the various lighting conditions encountered during a wedding shoot.
I immediately realized the similarity in the need for artists to get
consistent accurate color in their jury images and incorporated the
technique into my seminars, which led to writing this article. |
|
Introduction |
|
Consistently achieving accurate color may be digital
photography’s most difficult skill to master. Shooting the same subject
under different lighting conditions can cause unacceptable color
variations which can be difficult and time consuming to correct later.
Digital cameras have many more color balance options than film ever did,
but when the ambient lighting changes from shot to shot, as it can at a
wedding, getting perfect color in camera can be
impossible.
Automated solutions promise much but are often
inconsistent. Without a known neutral in the image their color balancing
act is mostly guesswork. Including a true point of reference, such as Ed
Pierce’s Digital Calibration Target, simplifies everything. The following
workflow will give photographers a fast, easy way to ensure clean accurate
color. |
|
After shooting a reference image, one click color
correction is possible
|
|
Color Correction Tutorial |
|
You will need a digital camera that allows you to select
the white balance and adjust exposure manually, a full version of
Photoshop, a
Digital Calibration Target or
a reference card containing white, black and 18% gray
like the
MacBeth Color Checker to shoot. |
|

photo #1
|
|
Step 1 – Set the camera white
balance. You can use anything but Auto. Try and match the light source as
close as possible and do not change your selection for the duration of the
shooting session. To create an extreme example, I set the camera to a
cloudy day white balance and used only modeling lights mixed with
incandescent ceiling lights (photo #2) for illumination. |
|

photo #2 |
|
Step 2 – Photograph the
Digital Calibration Target to create a reference image. Be sure to fill
the frame with the Digital Calibration Target (photo #3). |
|

photo #3 |
|
Step 3 – Now photograph your
subject under the same lighting conditions. (photo #4) |
|
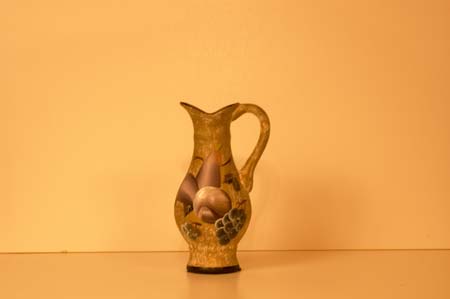
photo #4 |
|
Step 4 – Next, transfer your
images to your computer and open the reference image in Photoshop. Select
Image/Adjust/Curves to open the Curves dialogue. |
|
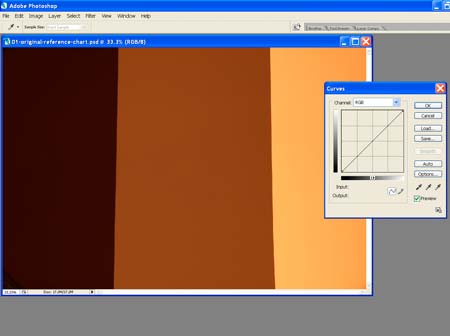
photo #5 |
|
Step 5 – Set the black, white
and gray points using the eyedroppers. First, select the black point
eyedropper and click it on a black area of the target (photo # 6). Then
use the white point eyedropper to click on a white area of the target
(photo #7). The lastly use on the gray eyedropper and click on a gray area
of the target (photo #8). |

photo #6 |
|
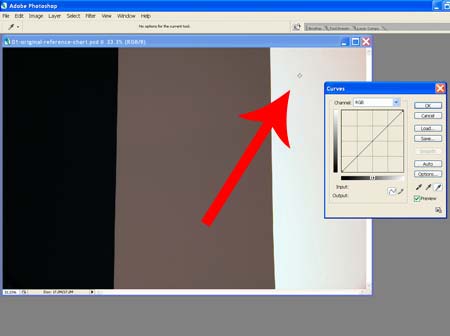
photo #
7 |
|
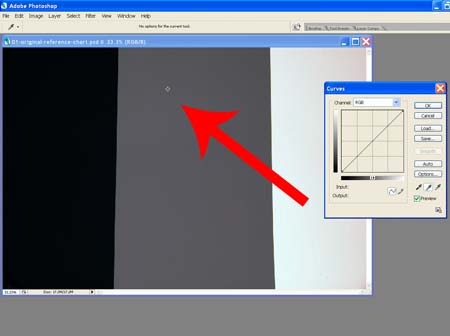
photo #
8 |
|
Step 6 – Now save the custom
curve you’ve just created. (photos 9 – 10) |
|
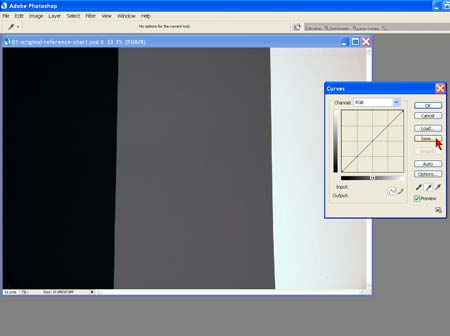
photo #9 |
|
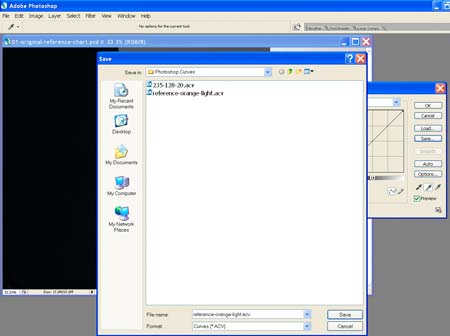
photo #10 |
|
Step 7 – Close your reference
image, and open the subject image you shot under the same lighting
conditions. (photo #11) |

photo #11 |
|
Step 8 – Open the Curves
dialog and load the custom curve you just created. (photo #12) You should
see the see the results immediately. (photo #13) |
|

photo #12 |
|
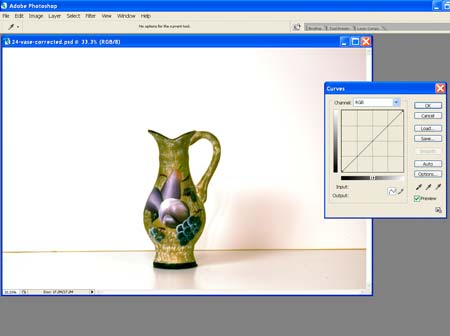
photo #13 |
|
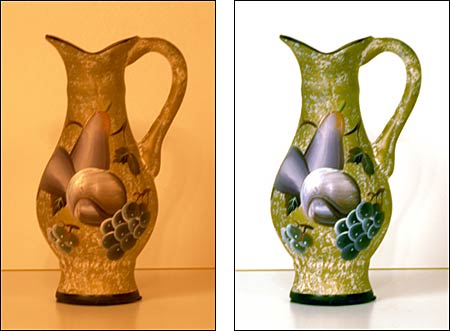
Before and After (photo #14) |
|
photo #14 |
|
Conclusion |
|
This is a fairly easy technique to master and if used
properly will consistently produce accurate results. By creating an action
in Photoshop to apply the curve, entire folders of images can be batch
color corrected saving countless hours of tedious work. |
|
It’s possible to use other reference targets but beware of
papers that have optical brighteners in them. Often the papers that look
the whitest actually fluoresce in UV, making your reference shot
inaccurate. You can safely use standards such as the MacBeth Color Checker
or photographic Gray Cards, but using a tool like the Digital Calibration
Target is quick and easy. Additionally, Ed Pierce includes a DVD that
details a technique to insure accurate exposure by tweaking the in-camera
histogram. |
|
Resources |
|
Photoshop |
|
Digital Calibration Targets are available in two sizes and
can be ordered from
PhotoVisionVideo.com. They are reversible and can be used as
conventional white reflectors also. |
| The
MacBeth Color Checker |
|
Tips on Photographing Your Own Art |
|
Read our
companion article on
setting your digital camera for the best quality digital jury images |
|
Hire me
to Prepare your Digital Jury Images |
|
Digital Jury Resources |

