|
|
|
How to Prepare Images
for Juried Art Services |
| |
|
Digital Jury Resources |
|
Hire me
to Prepare your Digital Jury Images |
|
Also read
Preparing Images for ZAPP |
|
Download the instructions and print them out |
| Juried Art Services requires
JPEG images sized to 1400 pixels long dimension at 300PPI (pixels per
inch). This will not be an issue for images already uploaded to JAS
because the previously asked for 700 pixel images are correctly sized for
jurying. But from now on JPEG images should be prepared at 1400 pixels. |
| Following is a basic workflow
to format images for Juried Art Services using Photoshop CS2. Everything
discussed is compatible with any version of Photoshop, Elements or any
other image editing program, except the conversion to the sRGB color
space. |
|
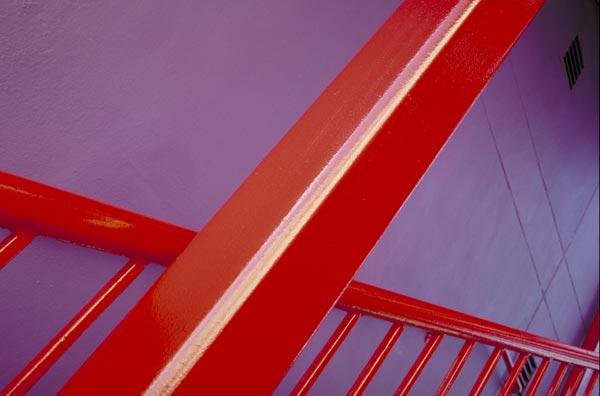
Original |
Step 1
Open your original image (above) and Save As an
uncompressed format like TIF. You need to treat the file that the camera
captured like a negative and never make changes and overwrite it. Always
save it under a different name in an uncompressed format before doing any
editing. Itís OK to shoot JPEG but you need to shoot at the highest
quality using the most amount of pixels that the camera is capable of
using. |
|
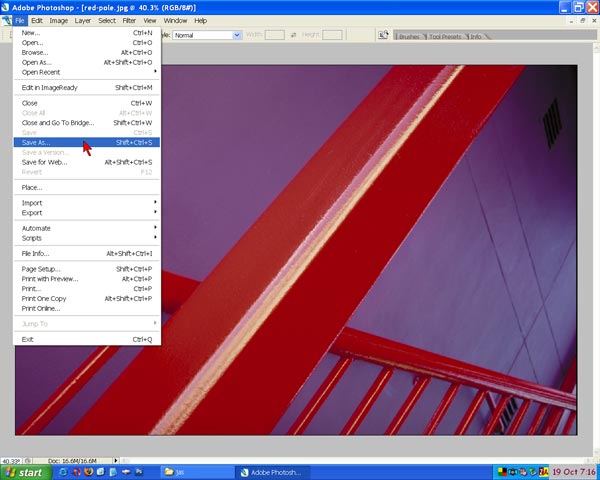
File>Save As (above) then choose TIF (below)
|
 |
|
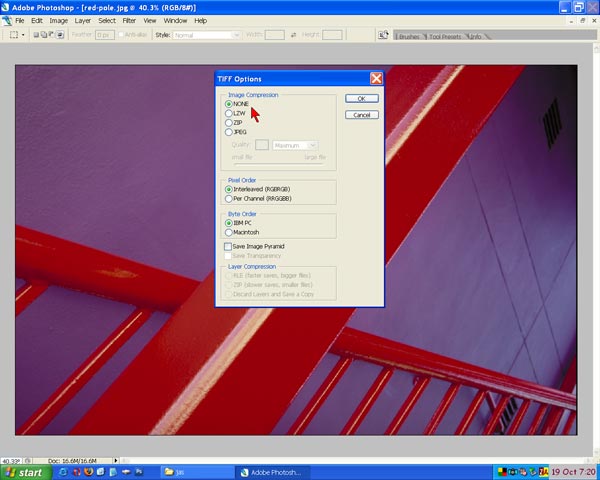
Make sure NONE is checked in the compression options
|
Step 2
Resize to 1400 pixels long dimension at 300 pixels per inch. This will
allow the image to be printed large enough to appear in the program.
|
|
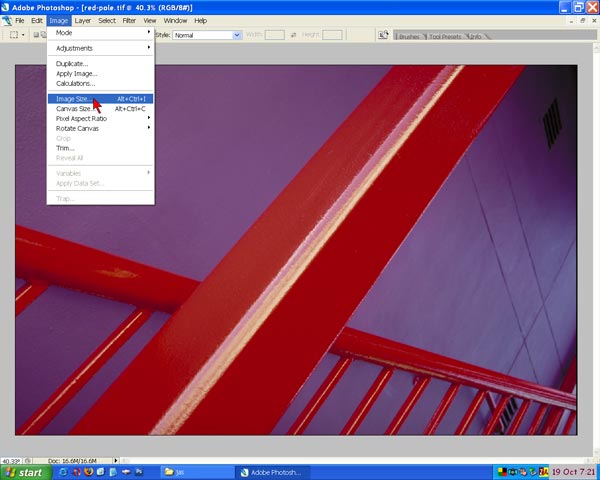
Image>Image Size
|
|
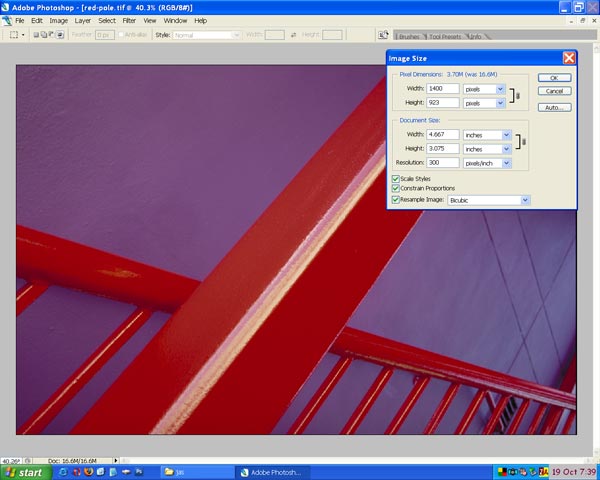
Change the resolution to 300 BEFORE
changing the long pixel dimensions to 1400
|
Optional Step
Optional here would be to save the new size image. File>Save As and add
1400 to the file name so you know what size the image is without having to
open it in your image editing program. |
Step 3
Convert to the color space profile sRGB so the images will display
accurately. In Photoshop CS, itís under Edit>Convert to Profile. In
previous versions of Photoshop itís under Image>Mode>Convert to Profile or
Profile to Profile. Only the most recent version of Elements allows
conversion to the sRGB color space. If you shoot with a consumer (built in
lens) digital camera, the color space is sRGB by default. If you shoot
with a DSLR (digital single lens reflex) with interchangeable lenses, the
more advanced cameras give you the option to shoot in either sRGB or Adobe
RGB. If your file is already sRGB, you can skip this step. |
|
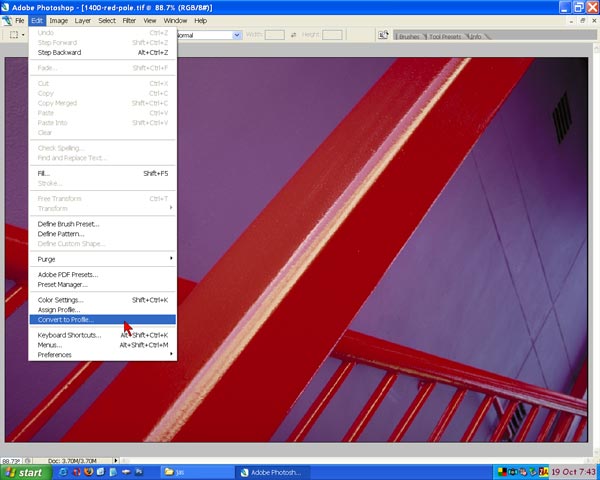
Edit>Convert to Profile
|
|
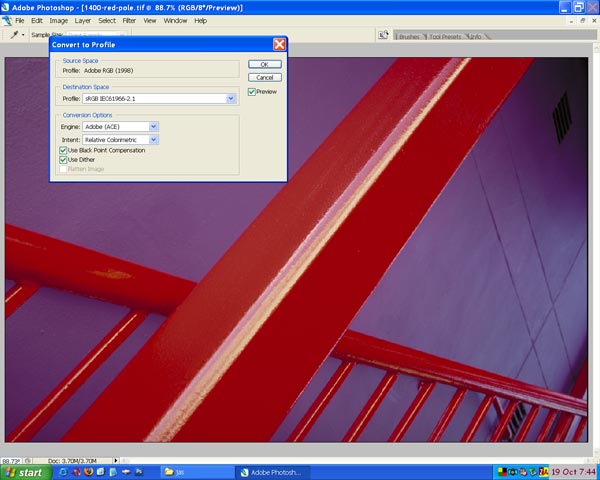
Source Space shows your current color space and
Destination Space is a drop down from which you choose sRGB.
|
Step 4
Save as JPG. For this last step, you have to use File>Save
As JPG. An alternate way to save as a JPEG is to use Save For Web but it
doesnít retain the 300PPI resolution that JAS requires. When saving as a
JPEG, you will need to choose the maximum quality (12) and make sure there
is a check in the box to include the sRGB color profile. |
|
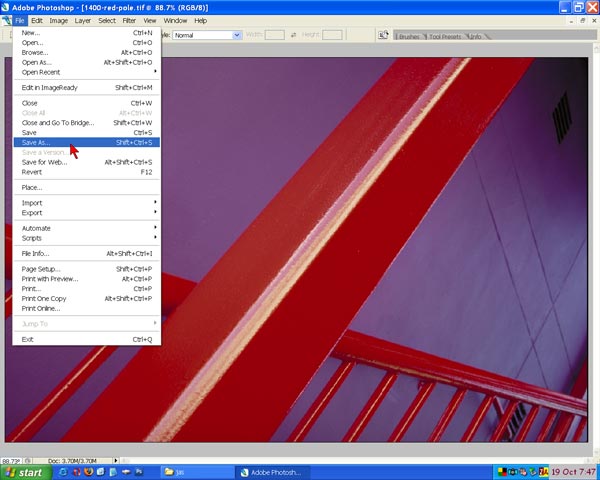
File>Save As
|
|
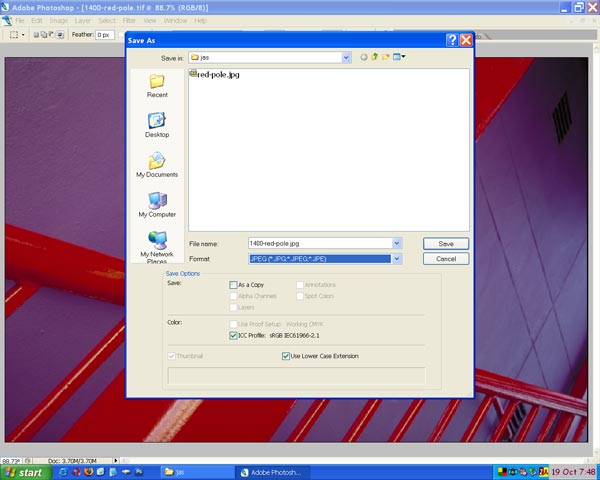
Choose JPG from the drop down choice of image formats
box
and make sure the ICC profile sRGB box is checked
|
|
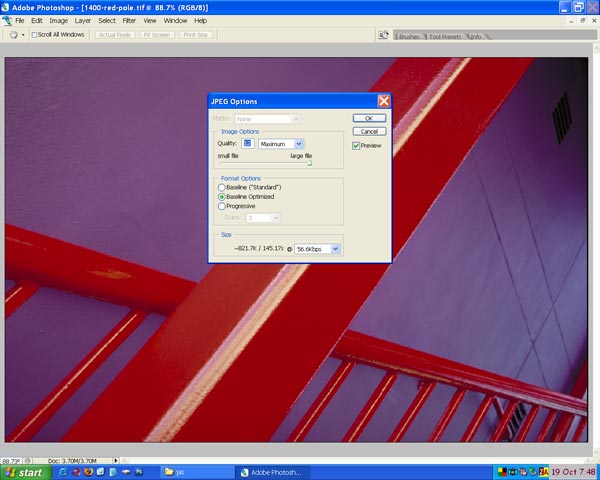
Choose a maximum quality setting of 12
by pushing the slides all the way to the right
|
|
|
|
Hire me
to Prepare your Digital Jury Images |
|
Digital Jury Resources |


