|
| |
|
 |
|
|
|
|
|
Digital Camera
Resources
Web Site Design for
Photographers |
|
Direct To Digital Prints with the Fuji
Frontier Printer |
| Read the entire
article in our press section about using the Frontier printer
which contains suggested work flows for beginner, intermediate and
advanced users. |
| How to
size your files so they won't be cropped |
| I had been reading about the Fuji Frontier
Printer on some of the digital forums for the past year. I finally had a
chance to make some prints at a local Costco store and was really impressed by the price and
quality of the output. The paper is Fuji Crystal Archive, the same paper
that the high end photo labs use with a 60 year life expectancy. Cost per
print is 20 cents for a 4x6, $1.99 for an 8x10 (8 inch roll paper), and $2.99 for a 10x15
(10 inch roll paper). Because I was the only one there Kevin showed me
that he had options of either cropping incorrect sized files, or the
ability to drop the file into a template to add a white border so it the
incorrectly sized file could still be printed in full. If you prepare your
image files properly, you can achieve the same quality output as custom
labs that charge five (or more) times as much. And the prints come out in
20 minutes. It should be noted here that the prices I've quoted are for
Costco only. Prices
from local competition was $4.00 per 8x10 at
Sam's Club and
$8.00 per 8x10 from
Ritz Camera
for the same Frontier prints. Be sure to call your local store and verify
the prices before making a trip. On an additional note, for those of you
needing quantities from the same image file, Costco offers a price break
of $1.49 each for 100 to 499 8x10's and $.99 each over 500 prints. |
Scanning 35mm
slides with the Frontier printer
Not many people know about this, but the Frontier printer can
produce high resolution scans (3000 pixels per inch) from 35mm
slides for 59 cents (price at Costco's). Over a one week
period I had 100 of my old slides scanned to create a new
Film Gallery and two galleries of
images for sale for my
fine art web site.
My scanned files were 4535x3035 pixels. Make sure to ask for a
scan for a 10x15 inch print. That will generate a 12 to 19
megabyte Jpeg which opens in Photoshop as a 39 megabyte TIF or PSD. |
How I prepare my
digital files for 8x10 Frontier prints
Asked about file preparation on my
CoolPix 990 forum I put
together this instruction list of how I prepare my files for 8x10
prints so the operator won't inadvertently crop and resize my
carefully prepared images.
Important to note that the Frontier printer is optimized for
300 pixels per inch, though I've had excellent with straight out
of camera Jpegs. I should also mention that I don't pay much
attention to color profiling for the Frontier printer. The color
space of all my files is Adobe RGB and even though the lab manager
told me the default color space is sRGB, my colors look excellent.
If you look around on the web you can find color profiles for the
different Frontier printers but before doing that I suggest
running a few sample tests.The file I used for my test was the
picture of my father's birthday at the bottom of the page. More
than enough skin tones for an accurate test.
1 - Open your file in Photoshop (or your choice of image
editing programs) and Save As an uncompressed file as either a PSD
or TIF which will become your working original.
2 - Do your editing, correct color, open shadows, crop etc.. and
Save As "working original 2".
3 - Resize your finished image. Go to Image>Image Size. Make sure
Constraint Proportions and Resample Image (Bicubic) is checked.
Enter 300 for the resolution and 10 for the width. If you're
working from the original size file, 7.5 will appear in the Height
box. Pay attention to the Pixel Dimensions above the size in
inches. It should now read 2250x3000 pixels. That's the same as
7.5 x 10 inches at 300 pixels per inch.
4 - Add Unsharp Mask if the image needs to be sharpened. Judgment
call based on your personal work flow and the particular image.
5 - Add a canvas so the image will print properly as an 8x10. Go
to Image>Canvas Size. If you're working in inches, change the 7.5
to 8 inches. If you're working in pixels, change the 2250 to 2400
pixels. In both cases, the exact same size border will be added to
the 7.5 inch sides to make it centered on an 8 inch canvas.
6 - Save As a TIF adding 8x10 to the file name. This will
be the file you take on CD or zip disk to be printed. An 8x10
becomes a 20.6 megabyte Tif file.
If you look closely at the
Antelope Canyon thumbnail below, you can see the black line
that represents where the actual canvas ends on the shorter
side. That way the print will come out with the white border
instead of the operator expanding and cropping the image to
fit the 8x10 paper size.
Same steps can apply to 4x6 inch prints. Specify the width at
4 inches and the height will automatically become 5.33 inches.
Expand the canvas so the 5.33 becomes 6 inches, etc...
This method will insure the largest working image within those
standard size prints. Be aware that they won't fit into
standard mats though. |
|
|
|
|
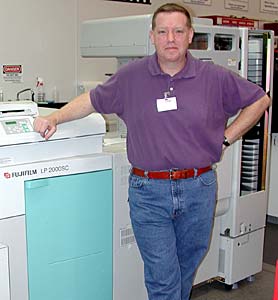
Kevin is the manager of the
Costco Frontier Lab
in Cranberry Township, PA (outside of
Pittsburgh) |
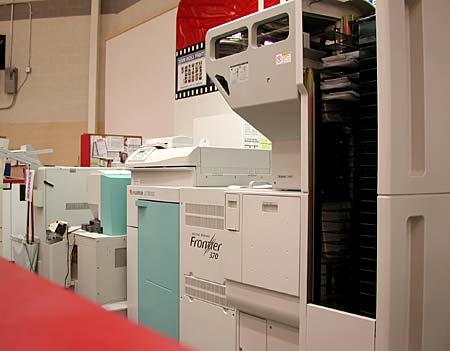
The Fuji Frontier 370 Print Processor |
The Frontier operator who cares
I needed some 8x10's printed first thing on a Sunday morning for a
magazine submission. While I
waited for the operator running the machine to finish the 35mm roll she
was preparing for 4x6 prints, I couldn't help but notice that she was
tweaking the density of each image. When asked, she explained that she
only ran the Frontier on auto if they were busy and backed up, or if the
customer requested so. Other wise she treated each picture as if she shot
it, figuring that if she wasn't satisfied than the customer wouldn't be
either. |
My family picture (below) was used for
a test print
The original file was a Fine JPG from the CoolPix 5000 and
was prepared as an 8x10 300PPI (pixels per inch) TIF file. The original
picture was taken with the camera on a tripod. Fill Flash was used to
balance the exposure between the people's faces and the daylight outside
the screened in porch. Skin color was perfect on the original file and on
the 8x10 print. My working color space was Adobe 1998. The lab manager,
Kevin, told me that the machine was set for sRGB but the color appeared to
match. |
|
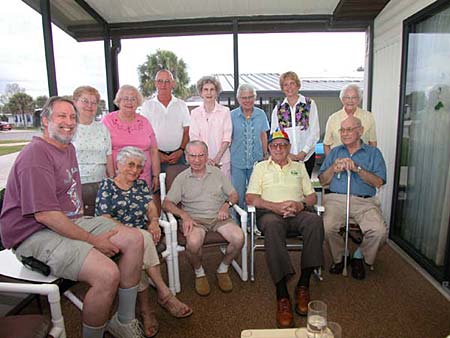
Avy's Birthday Party (wearing the hat), February 1st,
2002
That's me on the far left and my wife Mary standing behind my father |
Testimonial from a new Frontier user
"Just returned from my 3 hour trip to Norwalk, CT. That's the closest
Costco that has the Fuji Frontier Digital Processor. I discovered they
only have them in the new Costco buildings. They will be putting them in
any new construction, but will not be installing them in the existing
buildings -- at least not for now. I saved over $500 by taking them there.
Normally I pay $8.25 per print (8 x 12). I had 2 prints done for each of
43 images. I owe you big time! It was worth the 6 hours invested in
travel. From now on the guy said I could just send him my disks and he
would mail everything back to me. What a DEAL! And Crystal Archive Paper
too! This is an amazing discovery you have made." |
|
Digital Camera
Resources |
|
