 |
|
|
|
Support
BermanGraphics |
| |
|
|
|
Using the iPad for onsite standards review |
| Most art shows don't compare the submitted jury images
against what's in the booth when the artists are set up at the show. In
the past, a few art shows did this by having a volunteer carry a book of
35mm slides to
compare to what was in the artist's booth. I remember at one show, one volunteer pulled a red wagon filled
with loose leaf binders of slides while the other volunteer checked
the work in the booth against the slides. The iPad has replaced the red
wagon and it's much easier now to do onsite standards comparisons of images submitted against
the work in the booth, no matter how large the show. |
Reason for purchasing an iPad
When I first considered purchasing the iPad2, I had to do some serious
thinking of how I could get it to pay for itself. For me, it was about the
images and how beautiful they looked on the iPad screen. Iím using it to
show artists my portfolio of jury images when I attend or exhibit at art shows. The iPad has
a screen resolution of 1024x768, which may be low by todayís standards,
but has an advantage in viewing jury images. Uploading images in the
1920x1920 ZAPP format, which is approximately four times the screen
resolution, makes it easy to enlarge the image to zoom in to see detail. In fact, I
prepare my non ZAPP portfolio images at 2048x1536 horizontally, exactly
four times the screen resolution. And I keep the iPad locked in a
horizontal format, which displays horizontal images larger than a vertical
format displays vertical images. It also prevents the images from rotating
when the iPad is handed around. |
Portfolio App
The image viewing program best suited for this task is an app called
Portfolio,
which costs $14.99 and is available in the iTunes store. This is the same app
that commercial and wedding photographers use to show their portfolios to clients.
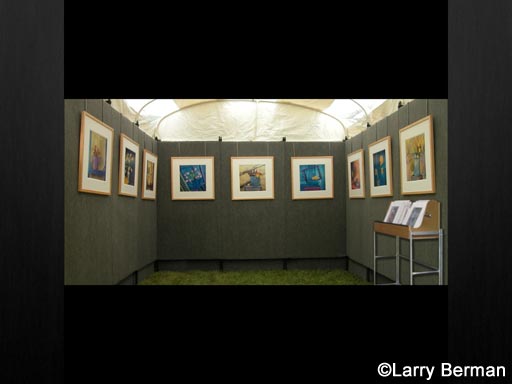
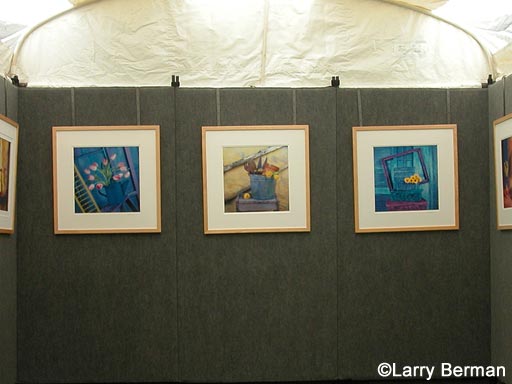
Iím going to suggest that the booth image is the only image needed for a
standards comparison. If properly sized or a ZAPP image, the booth can
easily be zoomed into to see individual artwork as shown in the screen
captures below. The only preparation the images need is to have the file
name start with the last name of the artist.
Portfolio allows the creation
of as many individual galleries as needed. I suggest creating a gallery
for each letter of the alphabet and load the booth pictures for each
artist into the gallery of the first letter of their last name. That will
allow quick access to the image of the artist whose booth you are standing
in front of, especially since show layouts change at the last minute.
Sorting can also be done by creating a gallery for each medium which may
make it faster to set the iPad up, but trying to find one out of fifty
jewelers, painters or photographers may be more time consuming. Most art shows not using ZAPP or JAS
are already asking for images (on CD) with the artist's last name at the
beginning of the file name. |
|

iPad screen capture
showing 1920x1920 pixel ZAPP format
in Portfolio |
|

iPad screen capture
showing 1920x1920 pixel ZAPP format
in Portfolio
zoomed in to see detail
it's also possible to scroll around the image |
Dropbox
In order to get the images uploaded to the iPad in the correct galleries,
you will need to install a program called
Dropbox on your
computer. Dropbox is a free program (available from the
iTunes store) that gives you space on a virtual server to upload your
images from your computer. Then the Portfolio app lets you download the images
from Dropbox into the respective galleries. It makes it easy to batch
download the images instead of downloading them one at a time. |
Setting up
First sort the images on your computer in the same series of folders that
will match the galleries in Portfolio. Then copy the folders to Dropbox.
Once the images are ingested into Dropbox (blue icons on the images turn
green), they will be available to download to Portfolio on the iPad through the Manage
Galleries>Select Gallery>Load From Dropbox. Click Select All>Load>Done
when they finish downloading. That will take you to the main screen listing all
the galleries youíve created. Do this download process for each Gallery. |
Finding the image youíre looking for
Selecting any gallery allows you to see all the images full size starting
with the first one. Tapping once on the first picture shows you a row of
thumbnails across the bottom with the image file names (starting with the
artist's last name) beneath each thumbnail. Tapping on the desired
thumbnail brings it up full screen. Spreading the image apart with two
fingers enlarges it if it was originally uploaded larger than the screen
resolution. Once enlarged, it can be moved around. Double tapping returns
it to screen resolution size and double tapping the upper left corner
brings up a Done button that lets you return to the page listing the
galleries. With a little practice, you can navigate the galleries and find
any artistís image in seconds. |
Viewing in sunlight
Because of the high gloss screen, itís very difficult to see the images in
direct sunlight. I created a 10x16 sun shield, similar to a lens hood, by
taping two 8x10 pieces of black mat board together to hold over the iPad
in sunlight. It folds slightly smaller than the iPad itself so I can keep
it with the iPad in its case all the time. |
|
Support
BermanGraphics |
|
Please call 412-401-8100 or
e-mail if you have any questions
or think I've made a mistake on this page |
|
Digital Jury Resources Section |


