I used the Nikon CoolPix 5000 for all the images created
on this trip except for the digital infrared.We hired a guide to take us to the picturesque locations
in Monument Valley for the sunrise. Not really knowing what to expect, I
tried to explain that I was shooting digital and would have trouble
capturing an image with the sun facing the camera. I was expecting to see
blown out highlights and flare.
First let me explain how I shoot. I almost always use the camera on
automatic. I keep the ISO set for 100 and always shoot with the flash
turned off. In working with fast changing lighting situations, I vary my
exposure (bracketing) by pointing the camera towards bright-lit parts of
the scene, using the exposure lock button to hold the now darker exposure
and recompose.
It’s important to understand what the camera is seeing and how it’s
reacting to the light. You can’t begin to understand unless you use the
LCD, which will show you what the lens is doing. In the three years I’ve
been using digital cameras, not once have I used the viewfinder opting to
see through the lens. I always recommend using the Xtend-a-View LCD
magnifying hood. I never use the camera without it. For pictures like
these, or any pictures for that matter, it’s imperative.
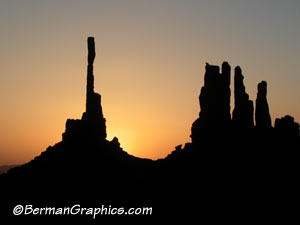
You can’t get the beautiful sunrise picture that I captured unless you
can properly capture the raw file. If I had been shooting slide film (you
can’t capture images like this using negative film and taking it to a one
hour photo lab for processing) I would have probably shot two rolls of
film at various exposures (bracketing) to capture my vision of what the
scene looked like. Using my technique described earlier, I bracketed the
exposure with the camera on Auto by centering the lens on the sun and
locking the exposure and recomposing. That gave me a darker exposure than
the camera would have given me just shooting. Composing was very precise
but easily done because I was using a tripod. I also shoot two frames of
each exposure to make sure I get the sharpest possible image. You never
know if the tripod will move even slightly, or something will affect the
image.
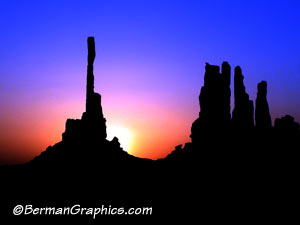
How did I get the raw file to look like the beautiful sunrise. I edited
the images looking for the best to put on the web site. I picked the
image with the best exposure that didn’t contain washed out highlights.
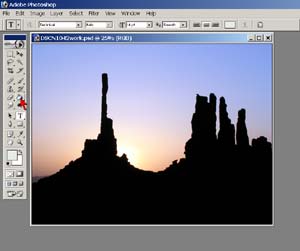
One of the first steps I always do is try Auto Levels. Sometimes it
improves an image dramatically and sometimes it doesn’t do anything
useful. Running Auto Levels showed that the CCD had really captured color
where the bland tan colors were showing. There were light blues and light
reds showing that were visible during the actual sunrise. The exposure
just needed to be darker to bring the colors out that captured my vision
of the event. I experimented with picking black and white points but that
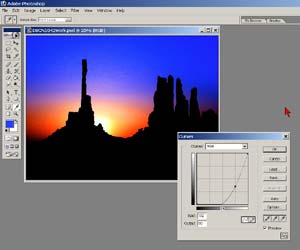
didn’t really do it. What made the difference, after running Auto Levels,
was running curves and pulling down on the diagonal line (darkening) until
the colors really popped.
In using Photoshop 7’s curves to darken and saturate the colors, I was
able to capture the exact same image post processed that I would have
captured in camera if I had been shooting slide film and bracketing.