|
| |
 |
|
|
|
|
The Fuji Frontier Printer
for inexpensive, high quality digital prints
Includes work flows for all skill levels |
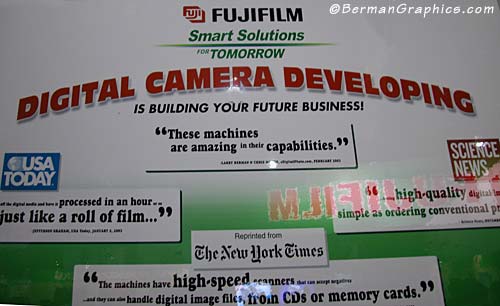
Fuji used a quote about the Frontier printer from our
magazine article in their booth.
"These machines are amazing in their
capabilities".
 |
| Sizing
your Files for the Frontier Printer |
| Nothing satisfies a photographer’s vision more than a
truly beautiful photographic print. Many of us have spent years in the
darkroom, honing our craft and learning how to make really fine
prints. Others have long standing relationships with professional labs
that they depend on to translate their negatives into excellent
prints.
Meanwhile, technology has been quietly at work, bestowing new
powers on the humble one hour mini lab business. In older mini labs
the machines printed negatives optically, just as you would in a
darkroom, but with far less control and quality. The newest devices
are far more sophisticated, scanning images in, digitally processing
them, and then using solid state RGB lasers to print them on
traditional photographic paper. The results are outstanding quality
photographic prints, produced quickly and inexpensively.
Of all the new machines being introduced, our current favorite is
the Fuji Frontier line of mini lab printers. These machines are
amazing in their capabilities. They can print photos directly from
your digital camera media, or work with images you have optimized in
Photoshop. You don’t even have to be a digital camera enthusiast to
benefit; they also do a great job printing 35mm, APS and medium format
films. |
How does it work?
The key to their quality is a combination of a high quality scanner,
sophisticated digital image processing software and RGB lasers that
image directly to the photographic paper, eliminating optical
degradation of the image.
Fuji’s “Hyper-Tone Image Processing” software automatically
performs localized density adjustments for high contrast and backlit
scenes, essentially burning and dodging the images, while the “Hyper
Sharpness Image Processing” creates crisper images by improving edge
definition of objects, shadows, and colors. There is also an automatic
“Grain Control Processing” function which reduces unwanted film grain.
The VPS software that comes with each machine also gives you the
choice of having your images printed with a variety of borders, as
well as on calendars and greeting cards.
The newest Frontier model, the 330, employees Fujifilm's
proprietary scratch and dust elimination system that uses an infrared
scan to pinpoint film defects and then digitally removes them from the
print.
All models use RGB lasers to expose the photographic paper, and
process the prints in a modified RA4 chemistry. The CP-48S chemicals
have been optimized to improve the print D-max for richer blacks. Fuji
Crystal Archive paper is a fine material to print on, and when matched
with a Frontier printer the results can be outstanding.
Fuji currently has four Frontier models on the market. Models 330
and 390 are capable of making prints up to 8” x 12”, while the models
350 and 370 can print up to 10” x 15”. |
Scanning 35mm Slides with the
Frontier Printer
Not many people know about this, but the Frontier printer can also
produce high resolution scans (3000 pixels per inch) from 35mm slides
and negatives for a remarkably low cost. (Costco's price was 59 cents
each!) Over a one week period we had 100 of Larry’s old slides scanned
to create a new Film Gallery and two galleries of images for sale on
BermanArt.com. The scanned files were 4535x3035 pixels and were saved
as 12 to 19 megabyte high quality Jpeg’s. These opened in Photoshop as
a 39 megabyte PSD files. Not all Frontiers’ will output at this
resolution; it will depend on the IC (image control) software in use.
Ask the operator to scan for a 10x15 inch print and that will set the
unit to output at its highest quality. |
Printing Your Digital Files
If you one of the many photographers who use an image editing program
like Photoshop to create optimized digital files, the Frontier can be
an excellent output choice. Depending on where you have the printing
done, the cost of an 8x10 photographic print can actually be lower
than the cost of paper and ink for a high quality inkjet print. And in
tests done by Wilhelm Imaging Research, Fuji Crystal Archive paper was
rated as having a 60 year display-life, far longer than most inkjet
materials.
The Frontier has been designed to treat images that
are brought to it on digital media differently than when it scans the
film itself. It won’t automatically try to adjust your optimized
Photoshop files, but it may crop them if you have not prepared them
correctly ahead of time. |
Profiling Your Local Frontier
To achieve the ultimate in quality and consistency, consider making
your local mini lab part of your calibrated work flow. Ethan Hansen,
a professional photographer from Oregon, has created a web site with a
database of freely available Fuji Frontier and Noritsu digital printer
Icc profiles for mini labs all over the country. The purpose of his
project is to be able to hand a client a color accurate proof when
shooting on location. Go to
DrycreekPhoto.com,
and see if a mini lab near you has been profiled. If not, download
Ethan’s Frontier or Noritsu profiling target and have it printed at
your local lab. Mail him the target and he will profile it at no
charge, and add the data to his online database.
The DrycreekPhoto.com site also has a very good
primer on color management issues, and explicit instructions on how to
use its ICC profiles with Photoshop. If you are serious about
consistent, optimized color these tools can help you achieve excellent
results with the inexpensive prints you can get from a Fuji Frontier
printer. |
Step by Step
Guide to Optimal Prints
We have outlined three different ways of working with the Frontier
printer. The beginner workflow
is for people who are used to dropping their point and shoot film off
at a one-hour photo and want the same easy way to obtain similar
results with their new digital camera. The
intermediate workflow is for those
people who are experienced in Photoshop or similar image editing
programs and like to manipulate their images prior to printing. The
advanced workflow is similar to the
intermediate workflow with one major difference. This is recommended
for professional photographers who want to use the Frontier printer
for color accurate proofs to provide clients. We’ve been using the
intermediate workflow for our own prints and have been very satisfied.
Note that the features and steps may vary from
printer to printer, based on the currently installed software and what
the operator has permission to do. |
| Beginner
– You can bring your digital camera or just
your memory card to your local 1-hour photo and they will be able to
make prints directly from your digital files. In our testing with the
files from our own camera we were able to get very good prints
straight out of camera. The only issue you will run into is that the
images will be cropped when printed at standard sizes, like 4x6 or
8x10. You need to tell the operator to size the images so they won’t
be cropped, which will make them slightly smaller with an added white
border around them. For example, digital camera files are proportional
to 7-1/2x10 and will be cropped if printed on 8x10 paper when the
7-1/2 inch side is expanded to 8 inches. |
Intermediate
(assuming you’re using Photoshop) – Fuji recommends your image to be
in a sRGB color space. Be sure to tell the operator that you do not
want any additional adjustment, for although the machine will not
automatically compensate, the operator still might try to be helpful
by making changes.
1 - Open your file
in Photoshop (or your choice of image editing programs) and Save As an
uncompressed file as either a PSD or TIF which will become your
working original.
2 - Do your editing, correct color, open shadows, crop etc.,
then Save As "working original 2".
3 - Resize your finished image. Go to Image>Image Size. Make
sure Constraint Proportions and Resample Image (Bicubic) is checked.
Enter 300 for the resolution and 10 for the width (or height if it’s a
vertical). Depending on the aspect ration of the original scan, the
size in the height box will vary. Pay attention to the Pixel
Dimensions above the size in inches. It should now read 2250x3000
pixels. That's the same as 7.5 x 10 inches at 300 pixels per inch.
4 - Add Unsharp Mask if the image needs to be sharpened. This
is a judgment call based on your personal vision and the particular
image.
5 - Add a canvas so the image will print properly as an 8x10.
Go to Image>Canvas Size. If you're working in inches, change the 7.5
to 8 inches. If you're working in pixels, change the 2250 to 2400
pixels. In both cases, the exact same size border will be added to the
7.5 inch sides to make it centered on an 8 inch canvas. We have gotten
into the habit of adding copyright, contact and image file numbers in
that border area, but you could choose to leave it white, or black, if
you want.
6 - Save As a TIF adding 8x10 to the file name. This will be
the file you burn to a CD or copy to a zip disk to be printed. An 8x10
becomes a 20+ megabyte Tif file. |
Advanced
(assuming you’re using Photoshop on a color calibrated system and have
the profile on your computer for the Frontier printer you’re going to
create your file for.
Thanks to Ethan Hansen for this example work flow:
A critical element in getting the most accurate color from any printer
is the use of a printer Icc profile. Profiles are a translation aid.
They allow color-savvy software such as Adobe Photoshop to convert the
colors in an image to a range that a printer can produce. Profiles
also allow correction of the image data so the final print matches
what you see on your monitor. These corrections are made to compensate
for how a specific printer outputs color.
Note that using profiles requires disabling all the
automatic image enhancement and correction routines that a Frontier
offers. Profiles assume that your image is already correct and needs
no further work at print time.
Before beginning, start with a well-calibrated and
profiled monitor. This is essential: you need to be able to trust what
your eyes see on the screen. After your monitor is brought into line,
using printer profiles requires some setup, but then becomes a fairly
straightforward process. |
The first step in using a printer
profile is to copy it to the correct folder on your computer. This
location varies with operating system:
Mac OS 9.x: Systems Folder/ColorSync Profiles
Mac OS X: Users/CurrentUser/Library/ColorSync
Windows 98/ME: \Windows\System\Color
Windows XP: \Windows\system32\spool\drivers\color
Windows NT/2000: \Winnt\system32\spool\drivers\color |
A condensed color managed workflow
follows:
1 - Perform any editing the image requires and save the file.
2 - If you are using an application such as Adobe Photoshop
that allows soft proofing (simulating on-screen how an image will
appear in print), soft proof to the desired Frontier profile. Make any
additional corrections necessary to the image. These include adjusting
highlight and shadow levels and minor curves or color balance
adjustments.
3 - Convert the image to the Frontier profile. This changes the
colors in your image file to compensate for how the Frontier actually
prints. If your image editing software shows previews, try both the
Relative Colorimetric and Perceptual rendering intents to see which
gives the best results.
4 - For best results, save the file as in 8-bit tiff format,
with no layers. Note: It is advisable to save the modifications to a
new file. Once an image has been converted to a printer profile,
further editing is not advisable, as the colors have been adjusted to
match a specific printer only.
5 - When you print the file ask the operators to print with all
the image adjustments, corrections, and conversions turned off.
Usually, this is referred to as printing in the "No corrections" mode.
|
| Chris Maher
and Larry Berman are photographers, writers, and web designers
specializing in image intensive photography sites.
Ethan Hansen
is an Oregon-based photographer. He was an early digital color
management convert, glad to have all the control a traditional
darkroom provides without the smell. |
Links:
FujiFilm.com
DigitalCameraDeveloping.com
DryCreekPhoto.com |
| Contents of this page © 2002 Chris Maher
and Larry Berman and is protected under United States and International
copyright laws and may not be reproduced, stored, or manipulated without
written permission of the authors. |
|
