 |
|
|
|
Support
BermanGraphics |
| |
|
|
|
Digital Image Viewing Recommendations for
Art Shows |
|
Please call 412-401-8100 or
e-mail if you have any questions |
|
Digital Jury Resources Section |
|
Scroll down to read about the ACDSee
image viewing program
and why it's recommend for viewing digital jury images |
Why PowerPoint isn't recommended
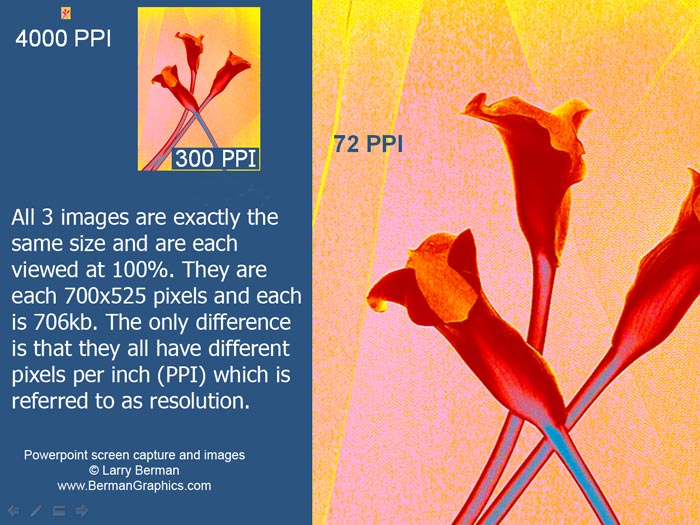
Contrary to the way digital images are viewed on monitors or digitally
projected, PowerPoint is resolution dependent and reads image files in
inches, not pixels. As you can see in the example below, the exact same
images in file size and pixel dimensions appear at different sizes when
imported into PowerPoint and viewed at 100%.
You can see how the images are
displayed accurately on this page. Therefore, each image needs
to be resized manually when imported into PowerPoint, which takes much
longer than loading slides into carousel trays. That's if the art show
wants to be fair to all artists and view each image at the exact same long
dimension. I purposely picked three common resolutions for this example.
72PPI is monitor resolution, 300PPI is optimum print resolution and
4000PPI is desktop film scanner resolution. |
|
Also, please
read this page on how PowerPoint can make graphics look mushy |
|

PowerPoint screen capture |
ACDSee
ACDSee (available for the PC only) is one of the easiest to use image
viewing programs. There are two ways to use it for digital jury
image viewing. If you've asked the artists to name their images using last
name, first name, image number, (like berman-larry-01.jpg) all images from
the same medium can be dumped into a single folder named for the medium,
and all images from each artist will stay together.
Double click on the first image and it appears full screen. Then using the
mouse wheel or space bar, you can scroll through the images one after
another, all at full screen. By default it shrinks images larger than your
monitor resolution (called fit to screen) so that each image
displays the largest it can without requiring scrolling. Then double
clicking on the full screen image thumbnails the entire folder of images
so you can go back and review select images. At any time, an image can be
enlarged to see detail using the + key. The second way to use ACDSee
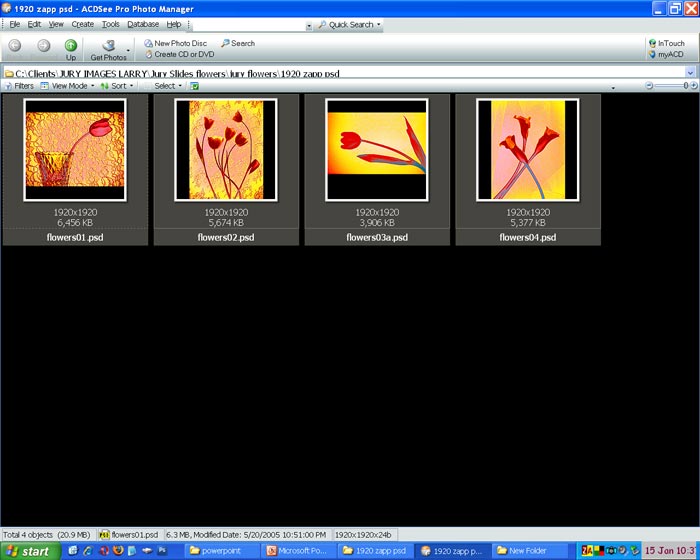
is to create a separate folder for each artist. Then when in the thumbnail
view (image #1), you can easily see the body of work from the artist.
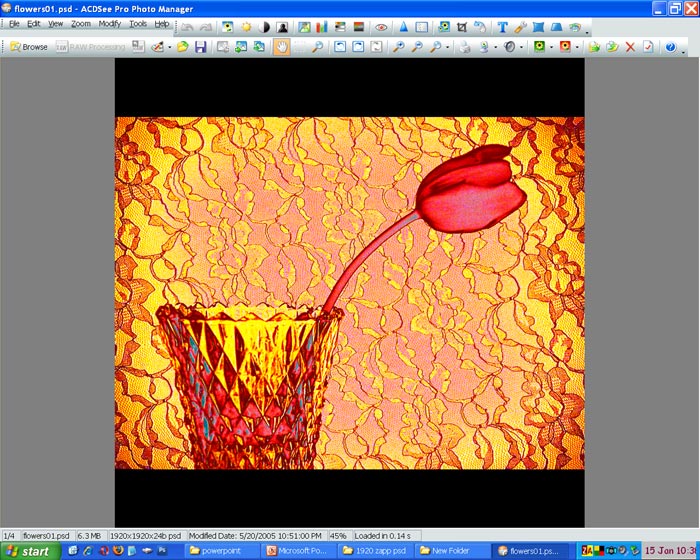
Double clicking on any image brings it up full screen (image #2) and
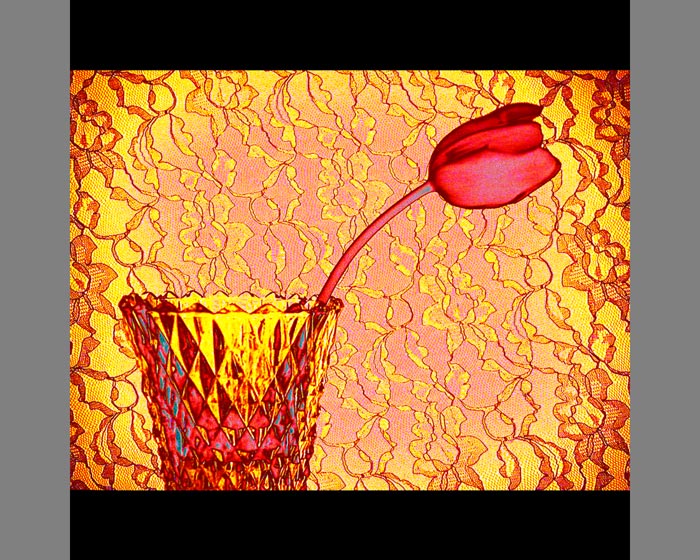
pressing the "F" key eliminates the tool bars (image #3) so that the full
image is all that you see on screen. Background color can also be chosen.
In examples #2 and #3, I've chosen to set the background color to a
neutral gray. It could easily be set to black so that the actual image is
seen without calling attention to the black ZAPP borders. Double clicking
on the full screen image takes you back to the folder and clicking on the
small green "up arrow" (upper left corner of image #1) takes you to a
thumbnails view of the parent folder where you can then double click on
the next artist's folder to view the images. When viewing a folder of a
single artists thumbnails, you can easily get a feel for the body of work. After using this program for
five minutes, you'll find it easy and intuitive to use. A trial version
can be downloaded from the
ACDSee web site.
You're looking for ACDSee Photo Manager under for home. |
|

ACDSee #1 |
|

ACDSee #2 |
|

ACDSee #3 |
|
Please call 412-401-8100 or
e-mail if you have any questions |


